 George V. Famiglio, Jr, CPA/PFS, CFP, CFS, CGMA. Est. 1971
How Can I Send My Mac Quicken File to My Accountant?
While we recommend QuickBooks over Quicken to track your business, we have a procedure you should follow when sending us your Mac's Quicken File.
Step 1 - View Your Quicken Transactions<
Open your Mac Quicken File, and click on the "Transactions" menu item on the left of the window under the TOOLS group. You should see a list of transactions on the right, and close to the top of that same window, a list of filters and a "Reset Filters" button.
Click on the "Reset Filters" button, and then choose an appropriate date range from the left most filter. If your not sure select "All Dates".
Step 2 - Export to CSV<
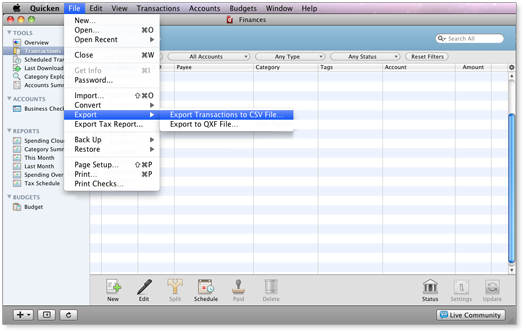
Now find the "File" menu item in the menu bar at the top of the screen. As shown above, go to: File >> Export >> Export Transactions to CSV File...
Step 3 - Save CSV File<
Give the file a verbose name, including the name of the business and date range of the transactions. Then choose to save to your desktop for easy access under the "Where" section. Next Export "All Visible Transactions". Then click on "Save".
Step 4 - Use Our Portal to Send the File to Your Accountant<
At this point you can send the file on your desktop using the Document Access <Portal. For additional help using the portal, please see our Document Access Portal Walkthrough.<

 <
<